Chocolate Olive Oil Snack Cake
Highlighted under: Baked Collection
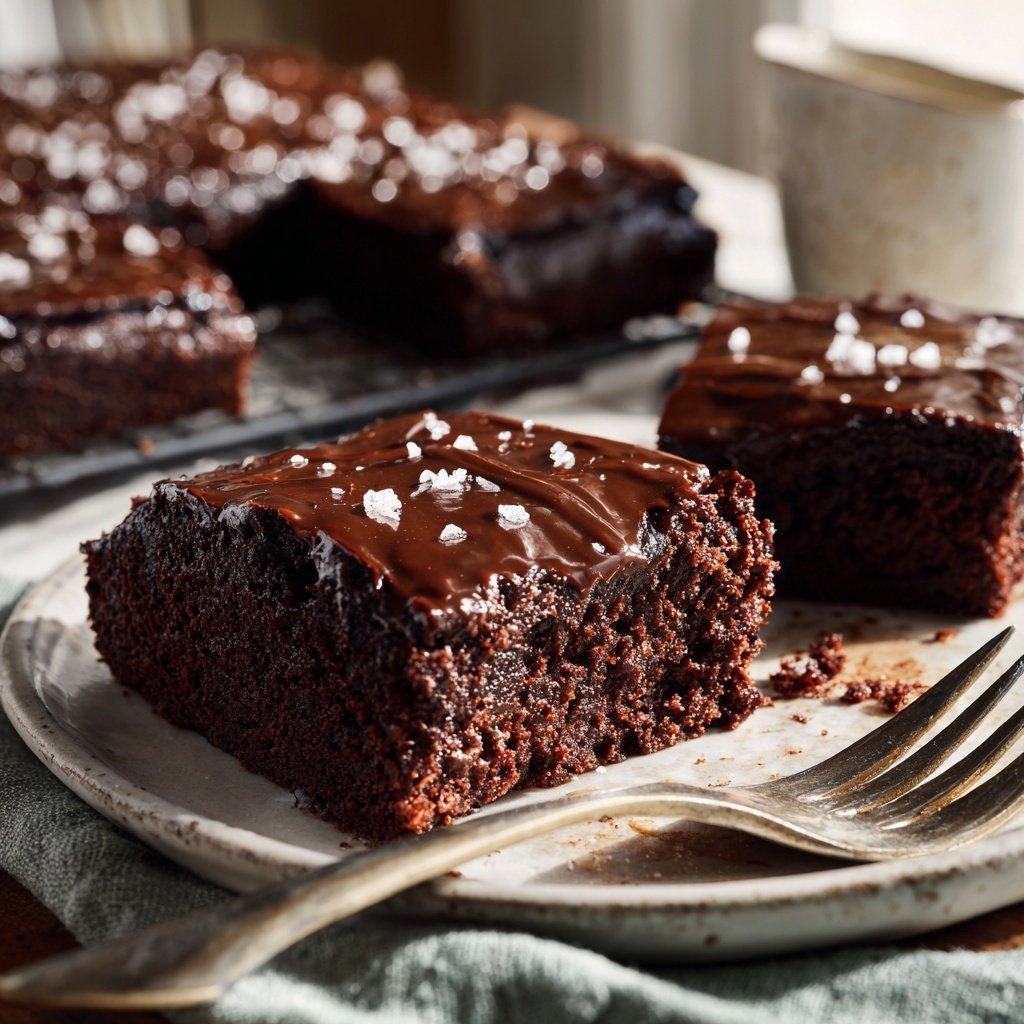
I absolutely love making this Chocolate Olive Oil Snack Cake for a quick treat! The combination of rich chocolate and the subtle fruitiness of olive oil creates a delightful flavor that keeps you coming back for more. I find that using high-quality olive oil not only enhances the cake's moist texture but also adds an unexpected depth. Whether enjoyed plain or with a scoop of ice cream, this cake is perfect for any occasion, and it comes together in no time, making it an ideal weekday dessert.
When I first tried making a cake with olive oil, I was surprised at how well it worked. By swapping butter for olive oil, I not only cut down on saturated fat but also introduced a wonderful flavor that made the chocolate shine. I learned to be mindful of the olive oil’s quality, as it directly impacts the final taste of the cake.
This Chocolate Olive Oil Snack Cake has become a staple in my kitchen. I've also experimented with adding orange zest and a pinch of sea salt on top, which elevates the dessert even further. It’s such a simple recipe that provides big flavors!
Why You'll Love This Cake
- Rich chocolate flavor paired with fresh orange zest
- Creamy texture that melts in your mouth
- Perfect for celebrations or as a sweet indulgence
Ingredients Matter
The choice of olive oil in this Chocolate Olive Oil Snack Cake plays a crucial role beyond just adding moisture. High-quality, extra-virgin olive oil enhances the flavor profile, providing a subtle depth that pairs wonderfully with the cocoa. Look for oil with fruity and peppery notes to elevate the overall taste. Avoid using lighter or processed oils; their neutral flavors won't do justice to the rich chocolate. If you prefer a milder flavor, you could experiment with a light olive oil or even a mild avocado oil as an alternative.
Incorporating fresh ingredients like buttermilk is vital for achieving the cake's creamy texture. The acidity in buttermilk interacts with the baking soda, creating a tender crumb and helping the cake rise beautifully. If you do not have buttermilk on hand, a simple substitute can be made by mixing regular milk with a tablespoon of vinegar or lemon juice. Let it sit for about 5-10 minutes until it curdles slightly; this will produce a similar effect.
Perfecting the Baking Process
Timing is key when baking this cake. It's essential to monitor the cake closely towards the end of the suggested baking time. The cake should spring back when lightly touched and a toothpick inserted into the center should come out with a few moist crumbs, not wet batter. If overbaked, the cake can become dry, so remove it from the oven as soon as it meets these criteria. If your oven tends to run hot, consider reducing the temperature by 25°F and keep a close watch.
Once out of the oven, letting the cake cool is just as important as the baking itself. Cooling it in the cake pan for 10 minutes allows it to set up properly, making it easier to transfer without breaking. Afterward, transferring it to a wire rack helps prevent sogginess by allowing air to circulate around it. If the cake is left to cool completely in the pan, the moisture may accumulate and lead to a gummy texture.
Ingredients
Gather the following ingredients to create this delightful cake.
For the Cake
- 1 1/2 cups all-purpose flour
- 1 cup granulated sugar
- 1/2 cup unsweetened cocoa powder
- 1 tsp baking soda
- 1/2 tsp salt
- 3/4 cup olive oil
- 1 cup buttermilk
- 2 large eggs
- 1 tsp vanilla extract
Make sure to have everything measured for best results.
Instructions
Follow these simple steps to bake your cake.
Preheat the Oven
Preheat your oven to 350°F (175°C) and grease and flour an 8-inch round cake pan.
Mix Dry Ingredients
In a large bowl, whisk together the flour, sugar, cocoa powder, baking soda, and salt.
Combine Wet Ingredients
In another bowl, combine the olive oil, buttermilk, eggs, and vanilla extract. Mix until smooth.
Combine and Bake
Gradually add the wet ingredients to the dry ingredients, stirring until just combined. Pour the batter into the prepared cake pan and bake for 25 minutes, or until a toothpick comes out clean.
Cool and Serve
Let the cake cool in the pan for 10 minutes before transferring it to a wire rack to cool completely. Dust with powdered sugar before serving, if desired.
Enjoy your delicious cake with a glass of milk or a scoop of ice cream!

Pro Tips
- For a gluten-free version, substitute the all-purpose flour with a gluten-free baking mix.
Serving Suggestions
This Chocolate Olive Oil Snack Cake shines when served simply, but you can dress it up for special occasions. A light dusting of powdered sugar adds an elegant touch without overwhelming the rich chocolate flavor. For chocolate lovers, consider drizzling melted chocolate ganache on top, which will create a glossy finish and an extra layer of indulgence.
Pairing a warm slice of cake with a scoop of vanilla ice cream or a dollop of whipped cream balances the richness perfectly. The cold creaminess contrasts nicely with the cake’s texture, elevating the dessert experience. You could also serve it alongside fresh berries for a pop of freshness, adding color and a slight tartness.
Storage and Make-Ahead Tips
This cake can be made ahead of time, making it a fantastic option for gatherings. Once completely cooled, wrap the cake tightly in plastic wrap or store it in an airtight container at room temperature for up to three days. If you need to store it for a longer period, consider freezing it, wrapped well in foil, for up to three months. When ready to serve, thaw the cake overnight in the refrigerator before bringing it to room temperature.
If you plan on serving this cake to guests, I recommend slicing it only as needed to retain its moisture. Additionally, if you find that the cake has become slightly dry after a couple of days, serving it warm with a drizzle of olive oil or a sprinkle of sea salt can revive its flavors and restore its appeal.
Questions About Recipes
→ Can I substitute the olive oil for another type of oil?
Yes, you can use canola oil or vegetable oil, but the flavor will be different.
→ How should I store leftovers?
Keep the cake covered at room temperature for up to three days or refrigerate for up to a week.
→ Can I freeze this cake?
Absolutely! Wrap it tightly in plastic wrap and freeze for up to three months.
→ What other flavors can I add to the cake?
Consider adding spices like cinnamon or nutmeg, or mix in chocolate chips for extra chocolatey goodness.
Chocolate Olive Oil Snack Cake
Created by: Hester Lockwood
Recipe Type: Baked Collection
Skill Level: Beginner
Final Quantity: 8 servings
What You'll Need
For the Cake
- 1 1/2 cups all-purpose flour
- 1 cup granulated sugar
- 1/2 cup unsweetened cocoa powder
- 1 tsp baking soda
- 1/2 tsp salt
- 3/4 cup olive oil
- 1 cup buttermilk
- 2 large eggs
- 1 tsp vanilla extract
How-To Steps
Preheat your oven to 350°F (175°C) and grease and flour an 8-inch round cake pan.
In a large bowl, whisk together the flour, sugar, cocoa powder, baking soda, and salt.
In another bowl, combine the olive oil, buttermilk, eggs, and vanilla extract. Mix until smooth.
Gradually add the wet ingredients to the dry ingredients, stirring until just combined. Pour the batter into the prepared cake pan and bake for 25 minutes, or until a toothpick comes out clean.
Let the cake cool in the pan for 10 minutes before transferring it to a wire rack to cool completely. Dust with powdered sugar before serving, if desired.
Extra Tips
- For a gluten-free version, substitute the all-purpose flour with a gluten-free baking mix.
Nutritional Breakdown (Per Serving)
- Calories: 380 kcal
- Total Fat: 26g
- Saturated Fat: 15g
- Cholesterol: 195mg
- Sodium: 85mg
- Total Carbohydrates: 32g
- Dietary Fiber: 3g
- Sugars: 24g
- Protein: 6g